Using a Cloud Service
Instead of installing Ruby on Rails and an editor on your computer, you can use a webservice for development. All you need is a browser and an internet connection. This guide explains how to get started with replit.com. If you’re using a different service, they may use a different wording, but the process is usually pretty similar.
1. Create an account
Go to replit.com and sign up for free.
You will need to confirm your email and then fill in your details.

2. Create a Ruby on Rails Repl
The Ruby on Rails Repl has all the software we need for the workshop already preinstalled.
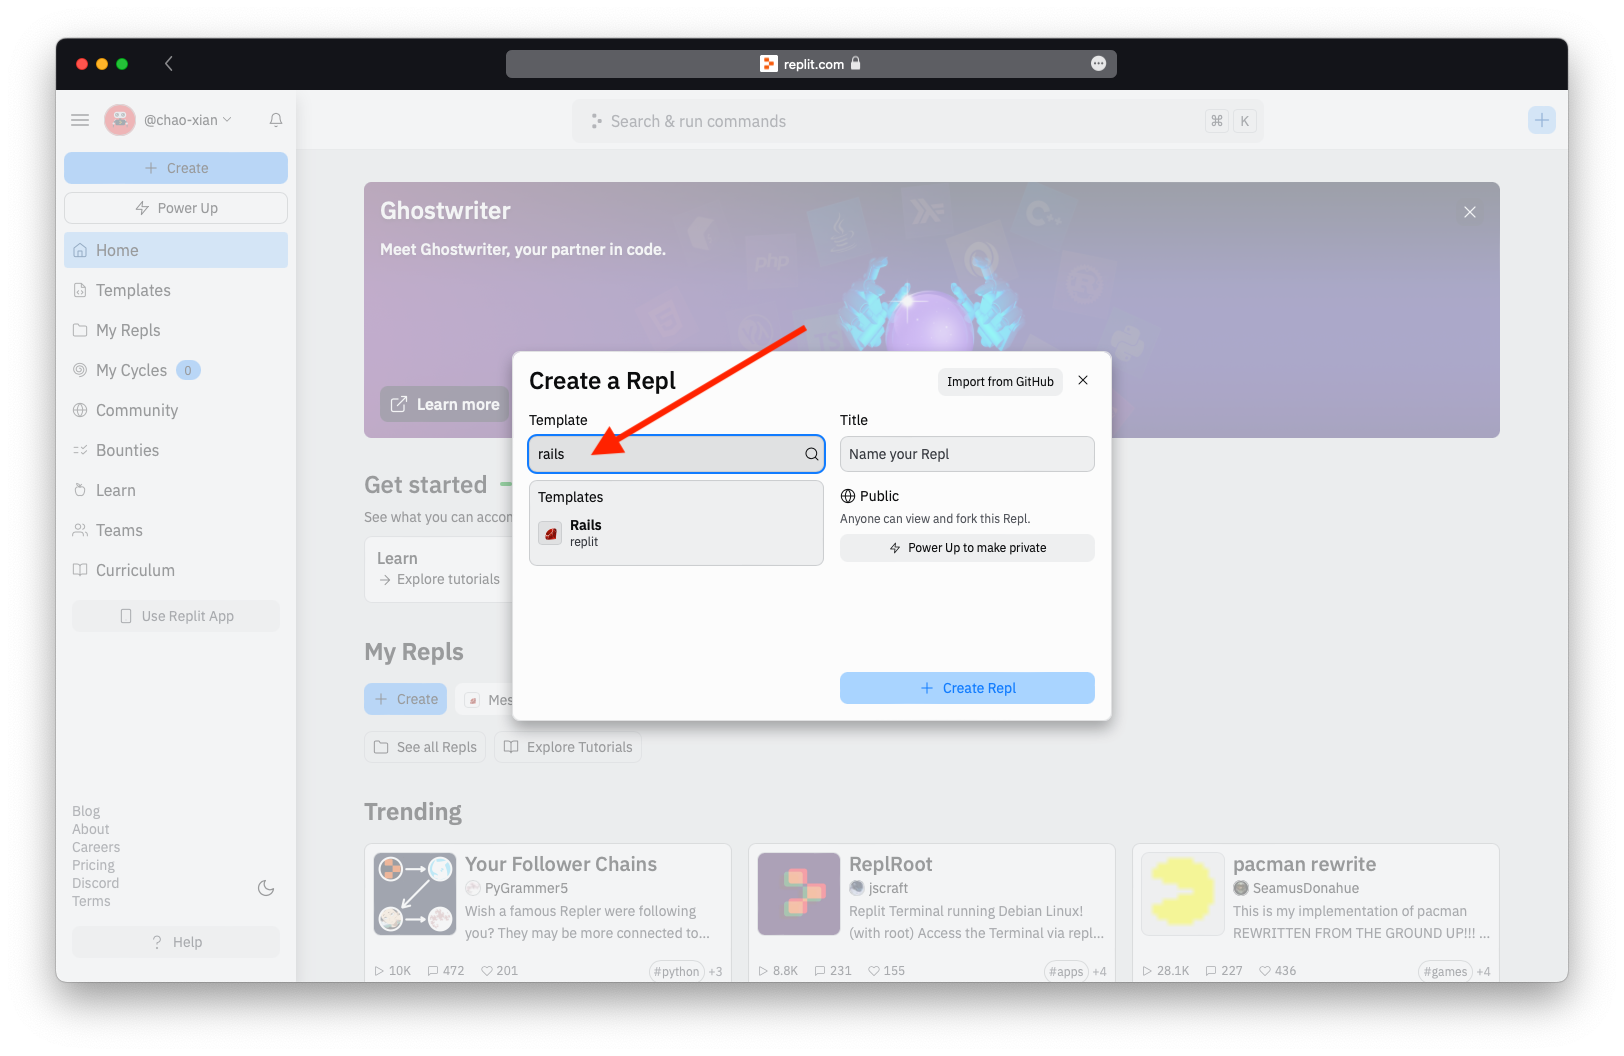
To create one, log into replit.com and click on ‘Create’.

In the field under Template, type in rails.

- Select the
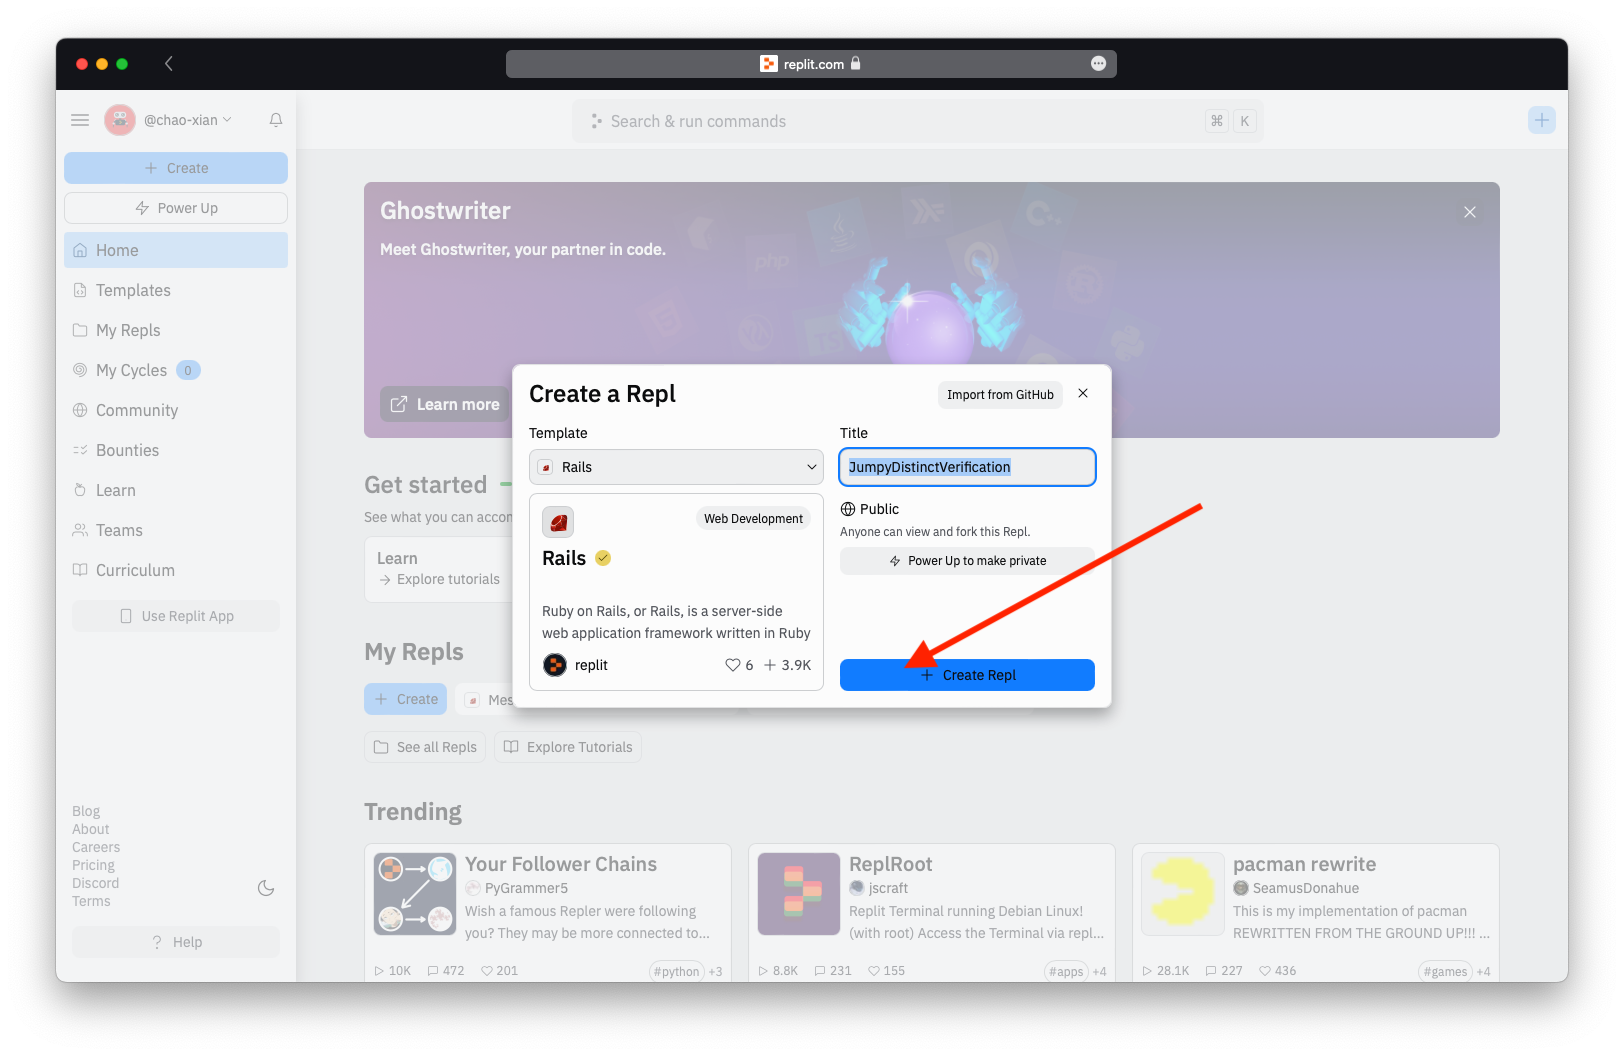
Railsoption from Templates. - It generates a name for your Ruby on Rails app but you can change it in the Title field (maybe to “RailsGirls”).
- Click the
+ Create Replbutton

3. Coding with your project
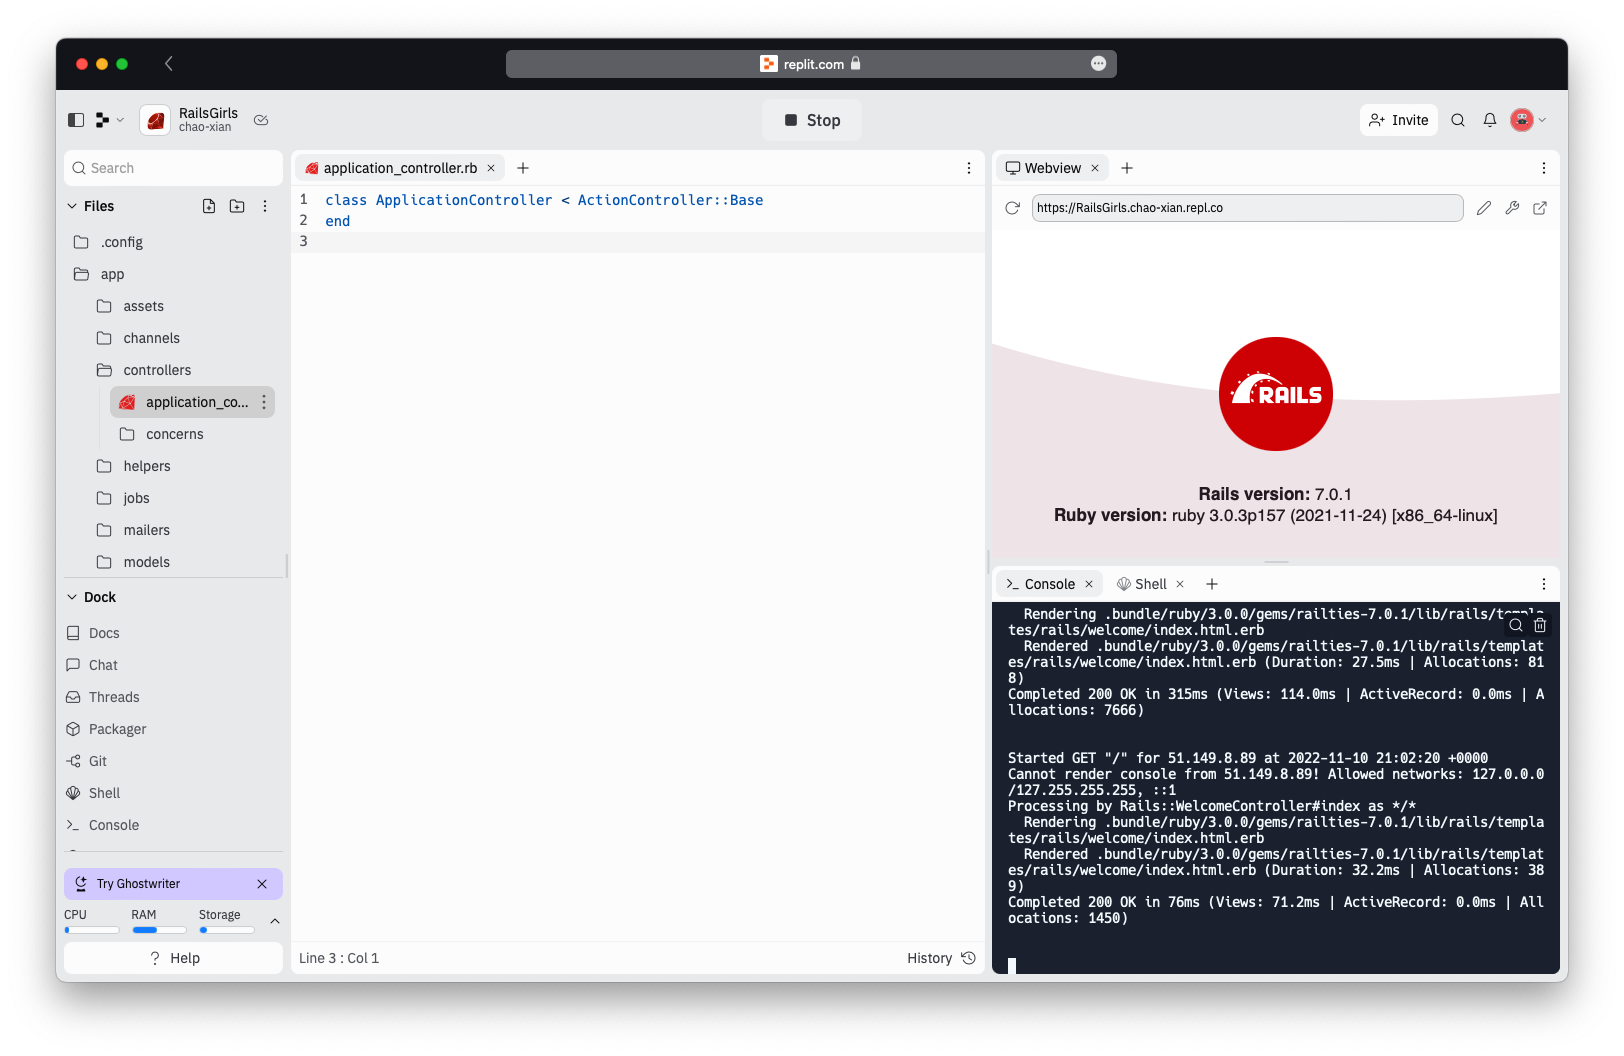
- On the left hand side, you find a file browser where you can navigate your directories and file.
- In the middle, you find the editor where you can modify your files.
- Click the
Runbottom at the top to start up the freshly installed Ruby on Rails app.

- You’ll see a mini web browser to the top right showing you your fresh Rails app running the default homepage with the Rails logo.

- At the bottom right, when you click the
Shellbutton you’ll find the terminal where you can run commands.

4. Returning to your project
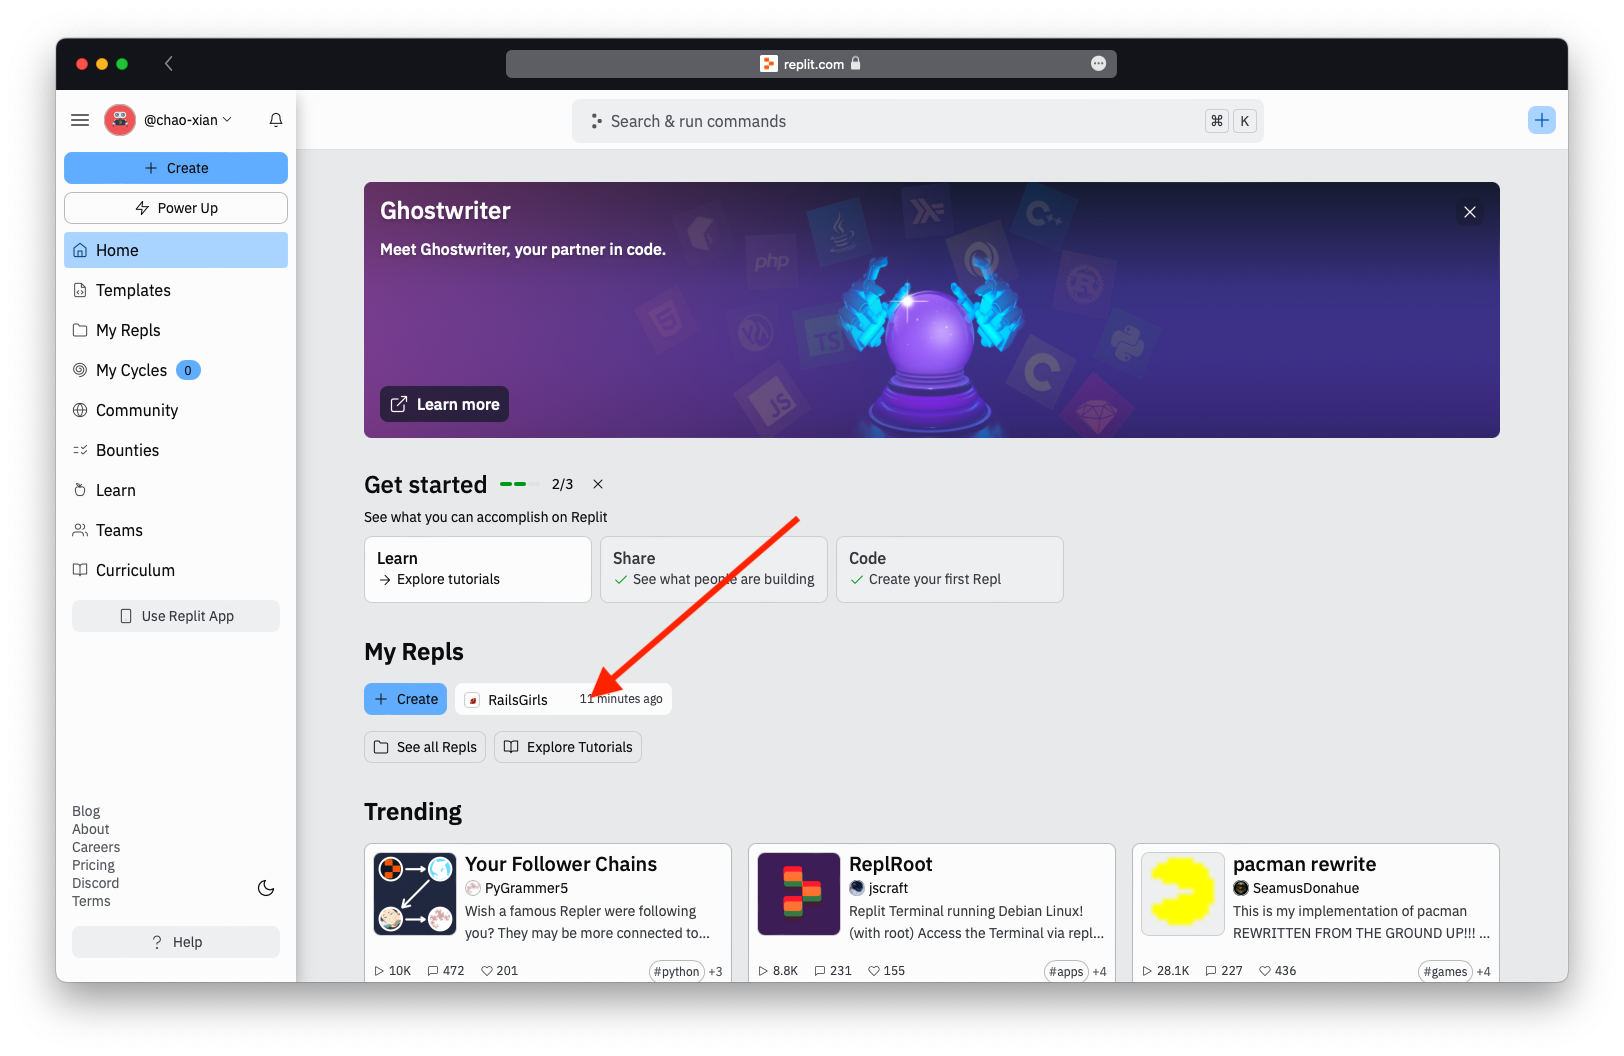
When you log out and log back in to replit.com, you can find your RailsGirls app in the middle of the dashboard. Just click it to go back into the project.

If you’re ever stuck during a guide, please ask your coach for help and also consult this handy cheatsheet for Ruby, Rails, the console, the Text Editor etc.
Guides
- Guide 1: Start of the guide
- Guide 2: Get to know the tools
- Guide 3: Guide to install Rails
- Guide 4: Build Your First App
- Guide 5: Style your app using HTML and CSS
- Guide 6: Add a new page to your app
- Guide 7: Add a new homepage to your app
- Guide 8: Add picture uploads
- Guide 9: Push Your App to GitHub
- Guide 10: Put your app online with one of these services:
- Guide 11: Style the idea pages using HTML and CSS
- Guide 12: Add comments to your app
- Guide 13: Create picture thumbnails
- Guide 14: Test your app with RSpec
